Quantcast
Channel: FJÄDERLÄTT
Viewing all 115 articles
Browse latest View live

Water in winter

$
0
0
In winter you have to melt snow or ice for water. You also have to carry reasonable amounts of water in order not to get dehydrated during the day. I use a system with one large container and two small ones. The small ones also are very useful for another purpose.

By Jörgen Johansson

Briefly, I store water in the big bottle, enough to last me from breakfast to lunch. I always stop and cook lunch, even in winter. Then I melt water to last me until night camp. The big container is stored in my pack, wrapped in my insulated pants and jacket. This keeps the water from freezing.

I also fill the small containers and carry them in a pocket in my shell jacket. I stop every hour and drink one bottle (330 ml) with some snacks like chocolate and nuts. If I am thirsty I drink more. I replenish the small bottles from the big one every two hours.

The small bottles are yoghurt containers. In the morning I heat water, put it in them and then put the bottles in my usually frozen ski boots. After having breakfast sitting in my sleeping bag the boots are thawed out, nice and soft to put on. I put the bottles, now cool, in my shell jacket and of I go.

More on my winter water system in this article.

Light up your winter nights

$
0
0
I just stumbled across a lightweight, solar powered lamp that looks interesting for winter camping. A brief video describes the functionality well. Worth testing?

By Jörgen Johansson


To shovel or to claw?

$
0
0
I have used a number of different snow shovels while winter camping during the decades. None are perfect for everything. If you are serious about camping in the snow and building your shelter in the snow you need some serious stuff. If you bring it more as an emergency tool and for digging holes for your tent anchors you might be better of with a Snowclaw.

By Jörgen Johansson

The Snowclaw is a sturdy piece of plastic with two holes for your hands. The photo below shows it with my cup to give you an idea of the size.

The Snowclaw is my regular shovel for winter trips and has been for years. Nowadays I rely on my tent for shelter and rarely need to move much snow. If you have to do some serious digging the Snowclaw puts some strain on your wrists, so it is an emergency shovel and as such should work OK. I like the fact that it has no mobile parts. There are certainly lighter emergency shovels but I am not sure they will do a better job in a survival situation.

Since I always bring my tent during winter outings it will be an exceptional situation (tent broken) before I would need the Snowclaw for digging an emergency shelter. Instead I use it for digging a place for my feet when sitting in the tent opening, feet outside. Or digging a shelf for my stove while cooking in the snow. Or as a snow anchor for my tent. Or as a windscreen for my stove.


Hands warm in winter

$
0
0
I am a bit shamed to admit that I have for more than 30 years used the same setup for protecting my hands during winter trips. Well, the setup is identical but 50 percent of the components have changed a number of times over the years. This is the where I start:

By Jörgen Johansson

The setup was founded when I, way back when, trudged around in Army clothes in deep winter way up north in Sweden. But then the baselayer was wool gloves. That worked alright when I could get a new pair every week, but when I had to pay my own way I switched to fleece gloves, like the ones seen above.

When it comes to this baselayer I have probably used, worn out or lost ten pairs during the decades. I want them pretty tight in order to be able to fiddle with stoves and other things without baring my hands to the cold. I ski in them and it has to be pretty cold, or windy, in order for them not to do the job, once I have been going for a while and the body is generating heat. They wear well and dry out fast.


In deep cold, or cold and wind on the tundra, my trusty pair of Helly-Hansen pile mitts with the nylon shell, has been with me since the early 80's at least. They are of a huge size and I almost alway wear them on top of my fleece gloves. They have always been windproof enough and warm enough inspite of some severe weather. When digging in the snow to make bivouacs or simply to anchor my tent I wear them to keep the fleece gloves dry. The mitts always dry out fast, even in wintry conditions. Sometimes I have used them to pull over my feet in the sleeping bag.

There might be better mitts today, buy why change a winning team?

The Incredible Rulk revisited

$
0
0
One of my absolute favorites for transporting gear and food when travelling in snow, is the Rulk. It derives its name from a combination of rucksack and pulk. It has the advantage of working (almost) equally well in both modes.

By Jörgen Johansson

If snow conditions are favorable it is way easier to transport your gear behind you in a pulk, than on your back. However, when snow conditions are less favorable, a pulk can be a 'drag' from hell. So why not try to find a solution that works well sliding behind you, but also can be easily carried on your back?

The story of my creation of and first winter trip with my rulk, along the Inland Rail of northern Sweden is told here.

My first version of The Rulk, a piece of aluminium bent in the shape of a trough and attached to the pack.
This trip and the Rulk also generated an article describing the construction in detail in Backpackinglight.com that can be read here.

The revised version was a cut-off Paris pulk made from plastic that has since been used in Sarek and on Finnmarksvidda. The thoughts behind and construction can be scrutinized here.

The Rulk spends most off its time sliding behind me, but sometimes it is better to just grab it and put it on your back.
On Finnmarksvidda I travelled with Joe Newton and we both used Rulks. Through no fault of Joe's we had to climb a steep slope in a ravine, sometimes dragging, sometimes pushing and sometimes carrying our contraptions. Luckily we had just finished this entertaining traverse when a storm hit. If you want to read more about this outing take a look here.

The Rulk used as a snow anchor up on Finnmarksvidda.


Double up or not?

$
0
0
It is usually a good idea to save weight by sharing gear with a team mate. But not always. On our Finnmarksvidda trip a couple of years ago, Joe Newton and I did not share any gear, simply because with light gear the advantage is not so great. Or maybe just the opposite. It might be safer not to share gear. These are the pros and cons as far as we could see.

By Jörgen Johansson

On this winter trip we brought:
  • Two tents
  • Two stoves/cooking gear
  • Two rulks
  • Two sets of firestarting, medical, repair etc
Considering that our two tents only weigh about 2,5 kilos together, it is not easy to find one good winter tent that weighs less. A Hilleberg Nallo would, but we did not own such a tent. The Nallo is also too short for my 190 centimeters. My old Hilleberg 3-person Keron with plenty of space and bombproof  to booth, weighs over four kilos. And of course, with two tents we had one spare, we could have survived in one tent.


We could maybe have saved a couple of hundred grams by skipping one stove and using a larger pot. However, this would have made melting snow and eating more complicated, since we had most of our meals in our respective tents.

We both used top mounted canister stoves that are not considered winter stoves but work fine down to at least -20 C. Bringing two stoves, each weighing less than 100 grams, could be considered a safety measure.

We could have put all our gear in one big Paris pulk, instead of having two sawn off into Rulks, and taken turns pulling it. But that would have completely ruined the whole rulk concept.  It would have been impossible to carry this big pulk on our backs.

The two rulks could, in an emergency, pretty easily have been turned into one long pulk unit in which Joe could have pulled me to the nearest hospital. I have holes drilled near the tops of my skis to make it easier to turn the skis into an emergency sled. Coupled with the pulks this would have been a very good emergency vehicle.


As for our true emergency gear (repair, medical, firestarters etc) it only weighs about 100 gram for each of us. So in total there was little to be gained from combining that stuff. It can even be argued that there is safety in both of us having all the gear we needed, should we for some reason, like whiteout, become separated. That can in fact happen, and it almost happened to me years ago, that I lost sight of my team mate in hard wind and swirling snow.

More about the Finnmarksvidda trip here. You can also search www.fjaderlatt.se with that keyword.

Skis in transit

$
0
0
Travelling with skis, especially on airplanes, can be a hassle. And my old bombproof  ski bag is not something I want to lug around in the backcountry. A couple of years ago I made a ski bag from some surplus materials. It weighs 42 grams, which is more like it.

I simply picked up some pieces of Cuben fiber and silnylon (green) that I had laying around and made a very light ski bag from these scraps. 42 grams is pretty light. It might pick up a small hole or two in transit, but that is not really something that hampers the function. I mean, skis are made to take a bit of punishment. A rip or two or ten in the ski bag can always be mended with duct tape.


Of course, if you want to go really light you can always check the waste baskets at the airport for discarded bagage tags. These long strips are really durable. You just twist them a number of times into the semblance of a rope and use them to tie your skis with, before putting them into the bag.

But maybe that is pushing the lightweight approach too far :-)

The beginning of mummies

$
0
0
I am rereading Dick Turners book Nahanni, one of the inspirations for my own backpacking and packrafting trip down this marvelous World Heritage river in Canadas Northwest Territories. Dick Turner came into the area 1930 and spent the rest of his life there, trapping, trading, boating, flying. Anything that could support him and his growing family. It is a great story about those days. It also mentions in passing something that has evolved a lot since then, making the nights warmer for all outdoor people.
Packrafting the Rock Gardens of the South Nahanni River
By Jörgen Johansson

One of Dick Turners first ambitions was to get out of his blankets and into a Woods Threestar Eiderdown. I searched the web and found one of the forerunners, if not the foremost forerunner, of the modern mummy sleeping bag.

"Eiderdowns" are often mentioned in stories like Dick's, from northern Canada and Alaska in the early 1900's. I found out that they probably never contained true eiderdown. That and a lot more can be found in this excellent writeup on the Woods Threestar.


If you want to know more about my own foray into that huge wilderness you can read about it on my blog here, starting here.


Shelter for forest part I

$
0
0
As Coast to Coast Sweden looms nearer I have begun to think about the kind of shelter I will use this year. Last years event was cold and damp, moisture was literally dripping from both the inner and outer walls of the Hilleberg Enan I used.
The same heavy condensation was also a factor when I hiked the John Muir Trail in October, using a Gossamer Gear The One for shelter.

So I have decided to make a shelter that will beat both of those for use in protected areas, like the forest.

By Jörgen Johansson

What I am looking for is spacious, windproof and well ventilating shelter that does not weigh more than 500 grams. I will start with the Cuben fiber tarp that you see in the above photo, from my packrafting trip down the South Nahanni River a couple of years ago. In this photo it is an extra roof over my Gossamer Gear The One.

During this trip when I backpacked into the Moose Ponds, source of the Nahanni, and then drifted down the river, I had some special needs. The tarp was usually where I did all my cooking, if it was raining. I pitched it a goodly distance from the tent, to minimize the risk of attracting bears to a sweet smelling tent with me sleeping inside.


I also used this tarp, weighing 200 grams, as a sole shelter for Coast2Coast Sweden in 2013. It worked well, pretty condensation free, but on a windy night (I did not use a bivy) the exposed sleeping bag left me less than warm. I have an innertent for my Trailstar that I have used for a couple of summers in Alaska as well as on the tundra in northern Sweden. The lower part is windproof and the upper part of this inner is bug mesh. A good combination, but less warm than a full fabric inner tent.

The plan now is to make an inner tent from lightweight ripstop and use Cuben fiber for a waterproof floor. In combination with the tarp this should be a good solution for 'hinge' season backpacking where temperatures hover around or slightly below freezing. For exposed areas above timberline this is probably not an ideal solution, it might not be able to manage high winds and drifting rain as well as for instance my Trailstar or a 'real' tent.

I will keep you posted on how this project develops.

Shelter for the cool forest part II

$
0
0
During 2015 I used a Hilleber Enan on Coast2Coast Sweden in May. The weather was cool and nights were usually only a couple of degrees above freezing. So I was not surprised that condensation was actually dripping in my face some mornings.
In October I hiked the John Muir Trail in California. I used a Gossamer Gear The One for shelter. A single skin tarptent it weighs less than half of the Hilleberg Enan, which is classic double wall very stable mountain tent. The One, with excellent ventilation, usually is not very condensation prone. But temperatures around, and sometimes below, freezing made it drip on my face some mornings as well.
So I decided to construct the ideal shelter for forests, where there is less need for storm-worthy tents. And also for temperatures were condensation is very, very difficult to avoid. A lot more on the background for this tent you will find in this blog post.
Gossamer Gear The One with pack and bear canister on the JMT.

By Jörgen Johansson


Here is a pictorial of the construction phase:
It all started with fabrics. To the right Cuben fiber (these days branded Dyneema) intended for the floor. Three sqm, weight 60 grams.To the right the yellow rip-stop nylon that would make up the walls and roof for my innertent.  10,5 sqm at 280 grams.

For all synthetics, and I do not use other materials for my sewing, I use a soldering iron and a steel ruler for cutting, on top of my stainless steel kitchen sink.

Cuben can be sewn, but when you want to connect Cuben to Cuben it is usually better to use a special tape.

I wanted a bath-tub floor for my innertent, so I used tape in the corners like this.

Then I cut the extra material in the corners away.

Time to start cutting the ripstop nylon. Same ruler and same soldering iron.

When all the cutting is done, all that remains is to insert the zippers and sew the pieces together. It takes a while.

In case you are wondering about the rain fly, I already had that. It is a Cuben tarp I made a couple of years ago. I weighs 200 grams including some pretty long guy-lines.

The two zippers in an L formation creates the entrance. I often cook in the tent and only opening the horisontal zip allows me to do this even in bug infested areas without getting terrybly invaded.

The idea behind this construction is as follows. In low winds in the forest (most of the time) I will use a high pitch like the one shown. This means that air will circulate freely under the rain fly, minimizing condensation. Hard wind and driving rain is seldom a problem in the forest, should they be I can get into a low pitch by shortening the telscopic poles. In a very low pitch the inner will sag quite a bit. We'll see how that works.
To sum things up: The entire inner tent weighs 310 grams and the fly weighs 210 grams. The size of the fly is 3x2,6 meters. A total of 520 grams plus pegs. This is pretty light, although I had hoped to stay below 500 grams.The ripstop nylon inner tent is not water proof, it will let out moisture from the inhabitant (or inhabitants, in a pinch two people can fit into it). It is also solid ripstop all around with no bug mesh. A solid fabric makes for a warmer tent in cool surroundings, particularly if there is a wind. A solid tent wall will also keep saturated air out better than mesh. This is more important with temperatures around freezing, when the air outside the tent can be damper than the one inside.


For warmer weather I have an innertent made for my MLD Trailstar that is solid ripstop about 0,5 meters up from the ground (for wind protection while sleeping). The upper portion of the innertent is mesh, which makes for better ventilation and view.

So, in cool weather the windproof ripstop will keep the wind and outside moisture out. It will let moisture from the inside out. If there still is condensation inside the inner tent (and there will be on occasion) the vertical walls at head and foot and the high ceiling will keep this moisture further away from my face. Less chances of it draping over me or dripping. More important, the chances of keeping my sleep system dry are better in this rather spacious inner tent.

The above is, so far, theory based on my experience. It will be nice to see if it works in the real world. I can already see that I made the inner tent a bit too high and also, was not able to fit the different pieces of fabric together in a way that kept the walls from sagging. So let us be modest and call this a prototype.

Gear at Coast2Coast Sweden part 1

$
0
0
I have just completed Coast2Coast Sweden for the 4th time, and it was a great experience, walking through spring across Sweden with a bunch of dedicated hikers. I will comment on some of the gear I used in a number of blog entries, starting with my sleeping bag.

By Jörgen Johansson

The sleeping bag I used this year, as well as for Coast2Coast Sweden in 2015, was a Haglöfs LIM Down. It is rated to +1 C and weighs a scanty 460 grams, which makes it one of the lightest sleeping bags in this temperature segment.

As can be seen in the photo above, the bottom opens up and you can walk in it. Something I do not much care for and have so far not used. This is maybe more of a habit than anything else. In theory it cold replace my puffy layer jacket for camp use, saving me 290 grams. Mostly it seems to chill my feet, making double socks a necessity for me on cold nights.


Last year was a really cold and damp year on C2C, with temperatures hovering around 0. I was frequently cold at night in th LIM Down. The dampness was seriously enhanced by a sturdy double wall tent of skimpy dimensions, often soaked with condensation in the mornings. So I was not at all certain I would bring the LIM Down on this years trek. But I did, and it turned out to be a winner.


This year on C2C we had some really cold nights in the beginning, May 5-10. One night was -1,5 C, according to one participant with a thermometer. In spite of this I was comfortable in my sleeping bag, albeit wearing most of my clothing since I am a cold sleeper. A big part of the success was no doubt due to my home made tent (the makings of which I have described and will comment upon later). This 'tent' kept my sleeping area very dry and comfortable and protected from the wind at all times. As a consequence my sleeping bag was also dry and comfortable, and my nights restful.

So, this means that the LIM Down has graduated to become my go-to sleeping bag for summer use.


Gear at Coast2Coast Sweden part 2

$
0
0
The second piece of gear used on Coast2Coast Sweden in 2016 that I would like to comment on is my homemade tent. It had some good sides and some bad sides. The goal was to have a dry and comfortable sleeping area during circumstances that were prime for creating condensation in a shelter. Did I succeed?

By Jörgen Johansson

The story behind the shelter, with focus on the inner tent (I already had a Cuben fiber tarp), and how it was made is told in detail here, so I will not repeat that. So what can I say after some 10+ nights in my new shelter?

Well, the inner tent it is very spacious for one person. It was actually designed to have room for two people in a pinch. In spite of this it only weighs 310 grams, which is nice. 520 grams in total with the tarp/rain fly, which made it one of the lightest shelters on C2C. Some of the lighter shelters were not bug proof.

I am happy to say it worked according to plan. We had some cold nights initially, the coldest being -1,5 C and that was sleeping close to a lake. There is no way to avoid condensation during circumstances like that. My rain fly was damp/wet and the outside of the innertent also slightly damp. Inside, however is was perfectly snug and dry and out of the wind. This kept my sleeping bag dry and the insulation was not compromised, so my night was chilly but I did not freeze. Of course, I wore all my clothes except the rain gear, being a cold sleeper.


So, I now have my lightweight, condensation free shelter for sheltered areas, just like I had hoped.

What was the downside then? Well, it is of course no shelter for exposed areas, where the wind can pick up speed and trash it. But winds of that caliber we had not. And if we'd encountered them I would have erected my little tent deep among the trees. And I will not use it above timberline, at least not if there is a risk of hard winds.

It is also pretty complicated to pitch. Not something I would like to do in a strong wind, but then that should hardly be necessary. It demands that you are used to pitching a rectangular tarp with no frills, using only lines, pegs and walking poles. This takes a bit of knowledge and a bit of time compared to for instance setting up my MLD Trailstar.

Gear at Coast2Coast Sweden part 3

$
0
0
The pack I used on Coast2Coast Sweden was new to me. It is part of a series of tests of European lightweight packs done for Backpackinglight.com a k a BPL. This one was a Montane Ultra Tour 55 (55 stands for volume in litres).

By Jörgen Johansson

The Ultra Tour 55 weighs 850 grams and is a framless pack with plenty of nifty details, some working better than others. I will be more detailed in my article, likely to be published on BPL this fall.

I have used framless packs quite a bit, and my old Golite Jam2 (605 grams) is still a favorite. In spite of this there are a number of packs suitable for multiday trips with light frames weighing less than one kilo on the market today. In my opinion framless packs have no weight advantage and thus should be history, since they put greater demands on the user. 


The idea behind a framless pack is that gear inside in combination with compression straps on the pack serve as a "frame", transferring weight to the hipbelt. So packing it takes some thought and a bit of care, you do not just dump things into the pack and close it.

Without going into more detail right now I can only say that the Ultra Tour 55 would have been a lot better with some sort of frame. It is possible that its little brother/sister (trying for PC here, not my best subject...) the Ultra Tour 40, would work better without a frame.

Gear at Coast2Coast Sweden 2016 part 4

$
0
0
Another piece of gear new to me, and also a test for Backpackinglight.com, was the inflatable mattress from Exped, a Synmat Hyperlite M, that I used during Coast2Coast Sweden this year.

By Jörgen Johansson

The Synmat Hyperlite M weighs 370 grams and is (almost) full length. Full length for most people no doubt, since it is 1,8 m long (almost because I am 1,9 m). It is 7 cm thick, fully inflated and 52 cm wide at shoulder level, but tapers towards the feet, where it is about 37 cm wide. It has a synthetic insulation inside, like all Exped Synmats, as opposed to the Exped Downmats which of course has down as insulation.

Since my Thermarest NeoAirxL Short got left behind in Alaska last summer I have been looking for a replacement. The Synmat Hyperlite M is heavier (the NeoAir weighed 230 grams) but also longer (the short NeoAir is 120 cm long).


My impression of the Hyperlite M during the fortnight on Coast2Coast Sweden is favorable. I alwas bring a foam pad which I use during the day and underneath the inflatable during the night. This adds quite a bit of insulation but the Synmat felt comfortably warm even during some nights of frost or near frost. It is supposedly good on its own down to -7C, so this was not really a test, just something I noticed.

You inflate the pad with your mouth or with some of several pump bags sold by Exped. Being a cheapskate I used my mouth on some occassions and borrowed pump bags from other Coast2Coasties on other.

The Synmat Hyperlite is certainly comfortable to sleep on and I have only one question mark. I felt that I was sliding downwards on it a lot (the sleeping area is seldom completely level and I keep my feet at the lower end). Sliding more than I am used to at night. However, this could be because of the slipperiness of my sleeping bag fabric (I used a Haglöfs LIM Down, see separate article on this).

I will continue testing this pad during the summer and fall, using other sleeping bags as well, and a full review of the Synmat Hyperlite M will appear in Backpackinglight.com, as mentioned.

Energy on the trail part 1

$
0
0
A female backpacker and friend sent me an e-mail about calories and hiking. She had been having problems with eating too little on her trips and felt other women were having similar problems. So she wondered if I could answer some questions she had. I said I would give it a try.

By Jörgen Johansson

Hello Jörgen,
The last year I have been very careful to eat enough when I am backpacking, since I used to lose weight and become very tired from eating too few calories. I have seen fellow hikers, women, make the same mistakes I did. They bring some packaged soups and a sandwich, which might be OK the first day, but then you start running a deficit. 

The danger is that you lose your appetite and cannot eat at all. I have tried to save weight in my pack and ended up bringing to little to sustain me. Women often ask me if I have managed to lose weight during my hiking and biking trips. It seems like many female hikers have a touch of annorexia. Couldn't you write something about this, how you combine a light weight pack with the right - and light - food? 

One of my most common arguments for a light packweight is: If the stuff you HAVE to bring is as light as possible (without losing functionality) this gives you a chance to bring more of the stuff you WANT to bring. This could be camera or climbing equipment. Or a bottle of wine. Or perhaps fresh food.

Two bear proof cans with two weeks of food that was flown into my resupply during a month long hike through the Brooks Range of northern Alaska.

Backpacking is a leisure activity that is meant to be enjoyed. If you eat too little to keep your blood sugar at comfortable levels, you will not have much fun. Fellow hikers will not enjoy you much either.You will become grumpy and running the risk that poorer judgement will land you in potentially dangerous situations. Once there you might not be able see the best way out.

Food is fuel for the body, it not only propels you forward, but also helps you maintain your body temperature. It contains the energy you need in order both to live and to enjoy life. Hypothermia, with the risk of freezing to death, is more of a problem in wet weather just above freezing than in ten below winther weather. Increasing apathy is a often consequence of not eating enough. The road to hypothermia goes via increasing apathy. Lack of calories is one component here. So trying to save weight in your pack by bringing less food is as clever as trying to save weight on your car trip by bringing less gasoline.

How many calories per day does moderate backpacking burn? What are the daily requirements? 

As usual the reply will be: It depends. Even if there are also individual aspects, however, some generalizations are valuable. Women need less calories than men. Small individuals need less calories than big and old ones need less than young.

Looking at the situation, hiking uphill craves more calories than hiking downhill, hikings fast more calories than slow, hiking with a heavy load versus hiking with a ligth pack the same. Low temperatures are also more energy consuming than high.
Lunch break along a river bed in Brooks Range.
The perhaps most important factor influencing your energy needs is probably how many hours per day you (actually) hike. Getting out of camp around 9 am into camp around 5 pm will of course mean less energy expenditure than hitting the trail av 6 am and getting into camp at 9 pm.

There are different ways of calculating these things and personally I stay away from the decimals. Usually we end up with some averages that indicate that men need 3500-5000 kcals and females 2500-4000 kcals for a day of backpacking. If you are a sturdy male speed hiker doing really big mileages  this will not be enough. I am not one of those and I know that my daily intake of  3200 kalories usually do not let me lose more than a 2-4 pounds/1-2 kilos during a week or two of hiking. I feel pretty satisfied with that and belive I have a good balance between input and output.

What I suggest you do, dear reader, is to put yourself in the kcal/per day framework above. Are you closer to 2500 kcals that to 5000 kcals? Make a rough guess, this is not rocket science, just some rules of thumb.

My hiking method is one of hiking for about 50 minutes and taking a break for ten minutes. Sometimes more if company is good. Less if I am alone in the rain. But I always take these breaks (which are more important in inclement weather IMHO, but that is another story). During the breaks I snack and drink water.

So my calorie intake is spread out during the day, with the biggest meal when I need it the most, around noon. As a consequence I am never, honestly, exhausted, depressed or churlish (hiking mates might disagree on that last one...).

Part 2 of this blog entry about energy will look at how I pack these calories and how much they do weigh.


Energy on the trail part 2

$
0
0
In part one of Energy on the Trail I talked about the need for calories while hiking and also approximately how many kilocalories the average male or female hiker need every day. In this blog entry you can read about how this translates into different food sources.

By Jörgen Johansson


I think it is well worth the time to return to the email I received and the questions posed by my female friend from chapter 1:
The last year I have been very careful to eat enough when I am backpacking, since I used to lose weight and become very tired from eating too few calories. I have seen fellow hikers, women, make the same mistakes I did. They bring some packaged soups and a sandwich, which might be OK the first day, but then you start running a deficit.
The danger is that you lose your appetite and cannot eat at all. I have tried to save weight in my pack and ended up bringing to little to sustain me. Women often ask me if I have managed to lose weight during my hiking and biking trips. It seems like many female hikers have a touch of annorexia. Couldn't you write something about this, how you combine a light weight pack with the right - and light - food?

It is always dangerous to generalize about differences between men and women Particularly since you run the risk of having people of strong persuasions on the subject, male and female, to come down on you like a ton of bricks. But I would venture to agree with was is written above, that perhaps more women than men see hiking as an opportunity to lose a few pounds. And what my friend had experienced herself was that this could be potentially dangerous, and if not, very unpleasant.
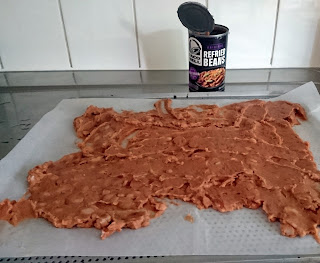
Some of the food for two weeks solo hiking in Alaska's Brooks Range.
Losing weight while backpacking
Let me point out, which I do in most of my books, that I do not think that you should combine any pleasurable activity, like your vacation, with giving up smoking or getting rid of other bad habits. Or loosing a few pounds. You will run the risk of making your vacation unpleasant both for yourself and people in the vicinity.

That said and done, you can in fact lose weight, and plan to lose weight during a backpacking trip, but you have to know what you are doing. This is how it can be done.

The trick is to eat less calories than you need, which forces the body to use its stored energy, a k a fatty deposits. BUT you have to do this in a controlled mode. This means taking small steps every day and in such a way that your blood sugar does not get low, leaving you discontented, hypothermic and a poor decision maker.

To do this you pack perhaps ten percent less calories than you expect to use while hiking and spread the intake of these calories during the day. Do NOT walk entire days almost without food, do not walk for long periods of time almost without food. Just eat a little less than you need every day.

The above involves trial and error and some homework. To begin with you have to make an assumption of how many calories you might need per day, using the info in Energy on the Trail part 1.

Then you make a menu for one day and check the amount of calories this will give you. Use food you eat anyway or think would be suitable. Checking calories is easy these days when all packages contain information about energy content. Otherwise just make a search for it on the internet. Just make sure you recalculate the calories/100 grams into what you actually consume.

Then you check this during a couple of backpacking trips and try to determine if you bring too many calories. Like you cannot eat all the food you brought. Or if it is too few calories. Like you are constantly hungry.
An aluminum pie tin weighs 5 grams, can be bought in any supermarket and serves as a lid for the pot.
In what form should I bring my energy?

We are not talking about day hikes or overnight trips, when you can bring almost anything you like. Or hikes when you do not walk much but are more of a camper than a hiker. We are talking about longer hikes for several days, weeks or months where you have distances to cover and want to do this with a light pack and still be fully nourished.

To start with, I think that backpacking food should be as calory dense as possible. The largest number of calories per gram of food. On a backpacking trip for a couple of days or weeks, what most of us do, we do not have to worry much about vitamins, minerals and things like that. What we need is energy to move and to enjoy and some proteins to balance the wear and tear and growth of muscles and other tissues.

Fat (9 kcal/gram) in different forms contain twice as much calories as carbohydrates (4 kcal/gram). However, there is a limit to how much fat we can ingest. 0,3-04 litres of olive oil has enough calories for a days need of calories, but I have yet to see someone who can subsist only on that. However, fat comes in many forms and easy to eat and digest is fat in nuts, seeds and the all time favorite for many hikers, chocolate.These fat sources are also easy to transport, with the possible exception of chocolate in really hot weather. Many people claim that when you are tired and nauseous from altitude sickness, chocolate is the only thing you can force down.I have experienced this myself high up in the Rocky Mountains.

Lunch on the trail, always a high light for me.

Carbohydrates found in bread, pasta, rice, potatoes, cous cous etc (the 'starch' part of most meals) are known as "slow carbs" because it takes a while for them to be made available to the body. They work long term. Straight sugars are also carbohydrates and they are "fast", immediately available to the body. Good to know in emergencies, not so good to subsist on entirely, since they give you blood sugar "spikes". These spikes can make you, at least feel, that you alternate between triumph and disaster all day long.

Protein, found most concentrated in meat, fish, eggs, peas and beans are about equal to carbohydrates when it comes to energy content. However, they are not mainly energy sources but should be seen as repair material for cells, muscles and other tissue.

So fat and carbohydrates are the main sources of energy for a hiker and you should bring enough to cover your daily energy needs. If you have to carry your food a long way it makes sense that it is dry (water is heavy) and has a high energy content. For long trips it should have a long shelf life, so it does not turn inedible on the trail.

In part 3 of Energy on the trail we will look at examples of how all this translates into menues.

Light packs for test

$
0
0
Testing some lightweight (less than 1 kilo) backpacks from Nigor and Pajak.

By Jörgen Johansson

I am doing an article on lightweight European made packs for the American e-zine Backpackinglight.com. The definition is that the packs should be big enough for multi day trips, ideally up to a week. And they should not weigh more than 1 kilo.

One pack that I used for Coast2Coast Sweden was the Montane Ultra Tour 55. I have written about that in an earlier post here om the blog.

I now have two more packs ready to be tested. One is the XC3 from Polish manufacturer Pajak.
The Pajak XC3 seen here is neither carefully nor fully packed. It is a hint, though, that this is more of an alpinist pack than a hikers pack since it lacks all outer pockets (except on the belt). Climbers usually do not want anything that can snag.

Here you can see the compression system, the reinforced bottom and a zipper (black) running along the side of the pack. As the light fabric indicates this is the lightest pack of the three.
 
The Nigor Zero L is sturdier and heavier and very similar to the Golite Jam 2 (one of my favorite lightweight packs). Since Golite is no longer in existence it feels nice that someone has picked up the ideas and makes them available. The view from the pack can be seen in the first picture. A long distance hikers pack with a lightweight aluminum frame and sturdier fabric than both the Montane and the Pajak. It is also the heaviest of the three,
I will be writing a full report for Backpackinglight on these packs. I would dearly like to include the Laufbursche Huckepack in this comparison, but the company has unfortunately ceased to communicate. Likely due to the illness of the founder of the company.

Energy on the trail part 3

$
0
0
In the earlier blog posts on this subject I have written about calory needs while hiking (Part 1) and about the calory content in different kinds of food (Part 2). Now I will talk about examples of how all this can translate into different menus on the trail. Starting with my own menu for the last couple of years.

By Jörgen Johansson

This is how I eat on longer trail hikes or wilderness trips:
 I put a premium on low dry weight and many calories and that the food is edible. Edible to me I should say. That is about it,  no gourmet stuff here. If you want to cheer things up or if you are a vegetarian I will talk about that in the fourth and last blog post in this series about food.

Breakfast: 80 grams (a couple of years ago 100 grams, I need less food as I get older) of some sickly sweet muesli, perhaps with fruit flakes, from the supermarket. The muesli should have a calory content of at least 400 kcal/100 grams.

I weigh this at home and put it in freezer bags with a tablespoon of dried milk (full fat if I can get it). In the morning I dump the contents of the bag into my cup and add water. Stir and eat.

Packaging morning muesli and dried milk in freezer bags.

I then take one soft mini tortilla from its excellent sturdy plastic vakuum package and roll it around a 10-12 cm/4-5 inch vacuum packed stick sausage (in Sweden sold in individually wrapped as 'beer sausage'). With this I have a cup of coffee. After that I am ready to go. Approximate calory content breakfast: 600 kcal.

Lunch/dinner: I eat the biggest meal around noon. This is from habit, I grew up with it, and because I want my biggest meal when I need the calories most, which is while I am hiking. It is also a highlight during the day for me to have a long lunch break. People who want to do high mileage days usually skip this and just snack during the day, often on the move. But I am more interested in enjoying myself by taking it slow, looking at the trees and the views and relaxing when I am hiking. This is a personal choice, everyone should hike their own hike.

Mashed potatoes and stick sausage. A favorite.
Two days out of three I have mashed potato powder for lunch, about 100-120 grams of it. This often translates to a commercial bag containing three ordinary servings. In the US you can by Idahoans with different flavoring in most supermarkets. They are the best I have come across so far. Into the mashed potatoes goes the jack-of-all-trades, about 50 grams of stick sausage. Sometimes I replace this with some 40 grams of dried, grated cheese and a teaspoon of garlic powder.

The third day, or when I feel like it, I have a commercial freeze dried meal for lunch. Both these varieties of lunch that I use contain more or less the same amount of calories. Approximate calory content lunch: 550-600 kcal.

Evening meal/dinner:
What I am about to reveal now will probably disgust you. For the last five years or so I have been having noodles and 50 grams of stick sausage as evening meal every single day on my backpacking trips. The noodles are ordinary commercial 90-100  gram bags of Ramen or similar brands. The flavor packaging gives a bit of variety, sometimes it is Beef sometimes it is Shrimp or Oriental flavor that I have with the pieces of sausage.

Hiking John Muir Trail last October, one evening a little voice in my head said: Hey, I do not like this, time to come up with something new. So I thought about this some.
What can I say? Noodles and sausage..
Then, six months later, came Coast2Coast Sweden and sure enough, the noodles and stick sausage were back. They were OK. Well, I am still thinking about replacing them. However, theses noodles are cheap and practical, needing no cooking. I just pour hot water on them and eat after five minutes or so. So perhaps it is the sausage and the flavoring that I should replace for some evenings. Approximate calory content evening meal: 500-550 kcal.

Summing up the above we find that these meals supply about 1600-1800 calories of my daily needs. So if I only ate these meals I would have a considerable calory deficit, as we have seen in Part 1. Where do the rest of the calories come from?

Well, I usually hike between 7.30 in the morning until 7.30 at night. So my evening meal is consumed between 8-9 pm. Between that and lunch I stop for coffee around 4 pm. This coffee break also consists of a soft tortilla and some stick sausage, just like breakfast. This adds about 200 kcal.

With the coffee I also have some of my regular snacks. I stop for 5-10 minutes every hour, come hell or high water, and sit down. I have a cup or two of water, depending on the weather (I seldom hike in really hot areas) and some snacks, on this hourly basis. This keeps me from becoming dehydrated and low in blood sugar. I am almost always in a good mood and loving my hiking. Every day I consume the following snacks: 100 grams/3,5 oz. of chocolate, the same amount in nuts and 50 grams/2 oz of raisins. This gives me a useful mixture of sugars that enter the blood stream immediately, and more slow acting fats. Approximate calory content snacks and coffee: 1450 kcal.
Hourly break: Water and some chocolate, nuts and raisins.
So my total calory intake for some serious hiking in some remote and not so remote areas is 3200 kcal/day. (I erroneously wrote 3700 kcal/day in an earlier post. That was old data and I have corrected it now, after doing the math on my current menu). This is obivously enough for me to hike on, not suffer serious blood sugar crashes nor lose much weight even on multi week hikes in demanding terrain.

The current stats on me is that I weigh 80 kilos/195 lbs on a 190 cm/6 feet 4 inch frame. I am also 60 years old and can remember when I was 25 and probably would have needed at least 50 percent more calories per day to keep me happy. So calory needs are highly personal and the best way to find the proper level is trial and error. By supplying my current menu I hope you will not start so far away from your personal needs that you suffer too much before you have it down to something that will keep you warm, comfortable and capable in any situation.

In the next and last blog entry food a k a energy on the trail I will talk about alternatives regarding calories and food stuffs. For instance, vegetarians would need something other than sausage sticks that will supply similar amounts of protein and fat or other energy.


Energy on the trail part 4

$
0
0
This is the final blog post about your only source of energy on the trail (and off): Food. These posts were initiated by some questions from a female backpacker who had suffered from calory deficit while on long hikes. She also was a bit worried about female hikers being more prone to this than male, because of a wish to lose weight. So she asked me a number of questions about food for backpacking that I have tried to answer in this series.
In this final entry I will add some variation and inspiration to the pretty austere dry food menu that I tend to use most of the time. Something for everyone, I hope, that will make the caloric intake on longer hikes more enjoyable.

By Jörgen Johansson

I suggest you read the earlier blog posts called Energy on the Trail in order to get the full benefit of the rather mixed bag of tricks and tips you will find in this final part.

Vegetarians
All vegetarians out there have already noticed from my menu, described in part 3, that I am not one of them. However, I do realise the need to cut down on meat consumption for a number of reasons. This is also something that I am testing in order to find tasty solutions for future long hikes.

What I need is to replace the abundant protein and fat in my sausage sticks with something vegetarian that will give me enough protein (including essential aminoacids) to replace what is lost by wear and tear on muscles and tissue during my hiking trips.

I am not venturing into veganism here. I know too little about the subject, although I have hiked with vegans and been impressed (astounded is perhaps a better word) by their capacity to hike on what I would consider 'almost nothing'.

There are a few amino acids, the building blocks of proteins, that are essential for humans which are almost solely found in meat, fish and other sources from the animal kingdom. They are not found in products like beans and peas, which are otherwise excellent sources of protein.

I have no problems with including milk and eggs in my menus, and they are excellent sources of all necessary amino acids. So milk and eggs are included in my menues. I might also add that Real Turmat, freeze dried food from Norway, have some excellent meals including different kinds of fish.

Dry your own
My own enthusiasm with home-dried food for the hills has varied considerably over time. But the good news for anybody being interested is that you can dry almost anything provided you have a decent oven. There are complete books on the subject that I recommend of you want to dig into it or even make it a hobby. However, in my experience most things can be dried using the method described below.

This is how it works. Cut some thin strips of beef, take some ground beef and give it a good spicing with salt and soy sauce for instance. Spread it out well, in a thin layer on some paper. Put it in the oven.

Take some raw eggs, crack them into a bowl and mix them thourougly. Spread the mix out on some paper.and put it in the oven. Tomato puré, sliced vegetables, almost anything follows the same process.

Put the oven at 45-50 C/ 110-120 F. If it is an oven with a fan just close the door. In an oven without a fan I leave a small opening in the oven door. Usually I stick the handle of a wooden spoon in between.

Leave for 8-12 hours or until it is so dry that it more or less crumbles between your fingers. Pack portions of it in plastic bags and put these in the freezer until you use them. This should not really be needed, but if you make big batches it might take a long time before it is all consumed.

The following photos show how I dried refried beans from a can, making them into instant, refried beans.

Vegetarian menus
Some of the best vegetarian meals I know come from Mike Clelland and Andrew Skurka. Some years ago I spent time with Mike, Ryan Jordan and others in the wilds of Montana. Our trailhead was a guest ranch where we were served locally produced beef steaks for dinner. The elderly lady of the house serving us had however received an order for a vegetarian meal, and asked who it was for. When Mike raised his hand the lady said: Here, I have some chicken for you.

This raised a general laugh, we all felt this was a reflection of what was considered vegetarianism in rural Montana. Perhaps also a reflection of our prejudices about rural Montana, and Mike took it with lots of humor.

Mike has written a book called Ultralight Backpackin' Tips. It contains 153 tips for lightweight camping. Part of that book contains recipes of lightweight, calory dense vegetarian food for hikers. Here is a companion website for the book.

Andrew Skurka has more experience of lightweight backpacking over long distances than most hikers. He is also a very nice guy :-)
Check out his website. His favorite outdoor dinner is Beans and Rice, and you find the recipe here. It contains instant refried beans, which is an excellent source of protein. However, instant refried beans are not easily bought in all parts of the world. One way of managing this is to buy a can and dry them yourself.

This series of photos show how I went about recreating his meal back home in Sweden.

A 450 g/1 lb can of refried beans spread out on some oven paper.

Into the oven at 50C it goes.

After 12 hours it is dry and crumbly when you touch it.

The 450 g have turned into 114 g. This is 2 portions according to Andrew's recipe.

I crush the stuff lightly, not into powder. You can do this manually or in a machine. Two portion bags are then placed in the freezer. This is not really necessary, they should keep for a long time stored in room temperature.

This is what it looks like, dehydrated, ready to eat, with crumbled Taco shells (a good replacement for Fritos) on top. It tastes better than it looks :-)
 Another favorite recipe of Andrew Skurka is found here. Thai Peanut Noodles.  There is lots more on food to be found on his webpage. This and some other stuff is also collected into an e-book. On Andrew's webpage you can also find a pdf on lightweight food that will meet your calory needs on long hikes.

The secret of the recipe is the sauce. It is a calory bomb, and very tasty

Some peanuts are port of  portion for one.
Crushing the peanuts slightly gives a nice crunchiness to the meal.


An ordinary package of noodles. I like the pieces short, so I crush them with my fist before taking them out of the package. The spice envelope included is discarded.
The meal, ready to eat. Yes, this one also tastes better than it looks. A sprinkle of green, like dried leek, could be sprinkled on top if you are very much into aestatics...


This ends my blog entries on lightweight food tips for long trails that are "guaranteed to keep you spry", full of energy and capable of enjoying your hiking. Remember, food and other gear are only tools for a great experience. But they often essential. Do not carry more than you need, it will only drag you down, mentally and physically.

Utveckla ditt vandrande - Walkshops i Stockholm

$
0
0
Under hösten 2016 kommer jag att testa vilket intresse det finns för Walkshops om vandring. De riktar sig till personer som har vandrat en del, kanske någon eller några dagar, och upptäckt vilken källa till återhämtning och utveckling det kan vara. Nu man veta mer om vad längre vandringar kan ge - och vad som krävs.

Att vandra långt och leva enkelt behöver inte vara så jobbigt som många tror. Det behöver inte vara farligt och packningen behöver inte vara tung.

By Jörgen Johansson

Jag kommer att anordna ett antal Walkshops med ett begränsat antal deltagare, där vi pratar medan vi går på stigarna i Nationalstadsparken i Stockholm. Jag ser att dessa Walkshops så småning kan innehålla olika teman, som fötter och skor, ryggsäckar, tält, mathållning osv. Men jag börjar mer allmänt för att avdramatisera det här med långa vandringar. 

Planerade tider för Walkshops under hösten 2016 är tisdagar och torsdagar enligt följande:
16, 18, 23, 30 augusti samt 1, 6, 8, 13,15, 20 september. Vi börjar klockan 17.30 när Östra Station/Tekniska Högskolan i Stockholm.


Mer exakt så träffas vi vid fontänen av Milles framför KTHs huvudbyggnad (se bild). Den ligger tvärs över gatan från Östra Station, mellan husarmarna som sträcker sig ut mot Valhallavägen.


Min tanke är att du skall kunna komma direkt från jobbet till dessa Walkshops. Därför bjuder jag på lite snacks för att få upp blodsockret innan vi börjar vår promenad. När vi har varit iväg en timma sätter vi oss på någon trevlig plats där alla får en macka och te eller kaffe. Så kan vi eftersnacka, de som har tid och lust. Har man inte möjlighet till detta kan man räkna med att vi är tillbaka nära Östra Station/Tekniska Högskolan klockan 18.30.

Det du behöver ta med dig är bekväma skor lämpliga för vandring. Vanliga löpardojor är vad jag rekommenderar. Vi kommer inte att hålla särskilt högt vandringstempo.Ta också med en flaska vatten och en liten ryggsäck där du kan förvara extra skor, vatten och kläder efter väder.
 
Min bakgrund är att jag har vandrat sedan tidiga tonår, allt från svenska skogar och fjäll till långa färder i några av världens största vildmarker. Med Coast2Coast Sweden har jag dessutom gått fyra gånger tvärs över landet, en tur på fjorton dagar från Kalmar till Varberg. En packe böcker har jag också på mitt samvete, på svenska Vandra Fjäderlätt - och njut mer av färden samt Lättare Packning från A till Ö. På engelska finns Smarter Backpacking-serien med tre böcker och hemsidan www.smarterbackpacking.com.


Kostnaden för en Walkshop är 200 SEK. För att försäkra dig om en plats (begränsat antal deltagare för maximalt utbyte och för att det skall funka att vandra och prata samtidigt) så anmäler du dig till mig via e-post. Du anger vilken dag du vill vara med, samt betalar 200 SEK via Swish senast 24 timmar före start. Självklart kan du ställa vilka frågor du vill till mig via e-post innan du bestämmer dig. Skriv till info@smarterbackpacking.com.
Viewing all 115 articles
Browse latest View live


Latest Images